
Power washing before painting: essential prep for lasting results
- Jonathan Hernandez
- May 5
- 9 min read

TL;DR:
Power washing is essential before painting because it removes microscopic contaminants that weaken paint adhesion. Proper technique, including detergent use and adequate drying time, ensures a long-lasting finish on Los Angeles homes. Neglecting this step often leads to premature paint failure, despite good technique or materials.
A quick rinse with the garden hose before slapping on a fresh coat of paint seems like enough, right? Not even close. Most homeowners planning an exterior paint project in Los Angeles don’t realize that the single biggest threat to a long-lasting finish isn’t the paint brand, the color, or even the technique. It’s what’s left on the surface before the first stroke of the brush. This article breaks down exactly why power washing is a non-negotiable step, how the process works from start to finish, and what you can do to make sure your next exterior project holds up for years.
Table of Contents
Key Takeaways
Point | Details |
Power washing is essential | Removing deep contaminants is key to a lasting, quality paint job. |
Detergent and technique matter | Thorough cleaning with the right products ensures proper paint adhesion. |
Proper drying time | Always let surfaces fully dry after washing before painting starts. |
Professional prep pays off | Hiring skilled pros or following best practices can double paint lifespan. |
Why is power washing necessary before painting?
Paint bonds to surfaces on a microscopic level. When that surface is coated in invisible layers of dirt, dust, mildew, pollen, or oxidized residue (sometimes called “chalk”), the paint is essentially sticking to contamination rather than to the actual material underneath. That bond is weak from day one. The result? Peeling, bubbling, and flaking that shows up far sooner than it should.
Clean isn’t always what it looks like. A wall that looks fine to the naked eye can still carry enough microscopic contamination to sabotage your entire paint job.
This is particularly relevant for homes in Los Angeles. The LA climate brings dry heat, Santa Ana wind events, and significant UV exposure, all of which accelerate the buildup of chalky residue and organic growth on exterior surfaces. By the time you’re ready to repaint, that wall may look passable but be loaded with contaminants.
Here’s why power washing specifically is the right tool for the job:
Mildew and mold grow in shaded areas and can’t be blasted off with plain water alone; they need detergent to break down the organism at the root.
Chalking (the powdery residue from degraded paint) releases from surfaces only when adequate water pressure and surfactants are applied together.
Dust and urban grime in LA settle into every pore of your siding, stucco, or wood and require mechanical force to dislodge.
Old soap residue or cleaning chemicals left from routine maintenance create a slick layer that paint simply won’t grip.
Microscopic contamination, organic growth, and chalk residue can prevent proper paint adhesion, and using detergent during power washing is what makes the difference between a surface that’s merely wet and one that’s genuinely clean. Learning solid exterior prep techniques is the foundation every successful paint job is built on.
Neglecting this step doesn’t just cost you aesthetics. It costs you money. Premature paint failure means repainting years earlier than necessary, and that’s a significant expense on any sizable home.
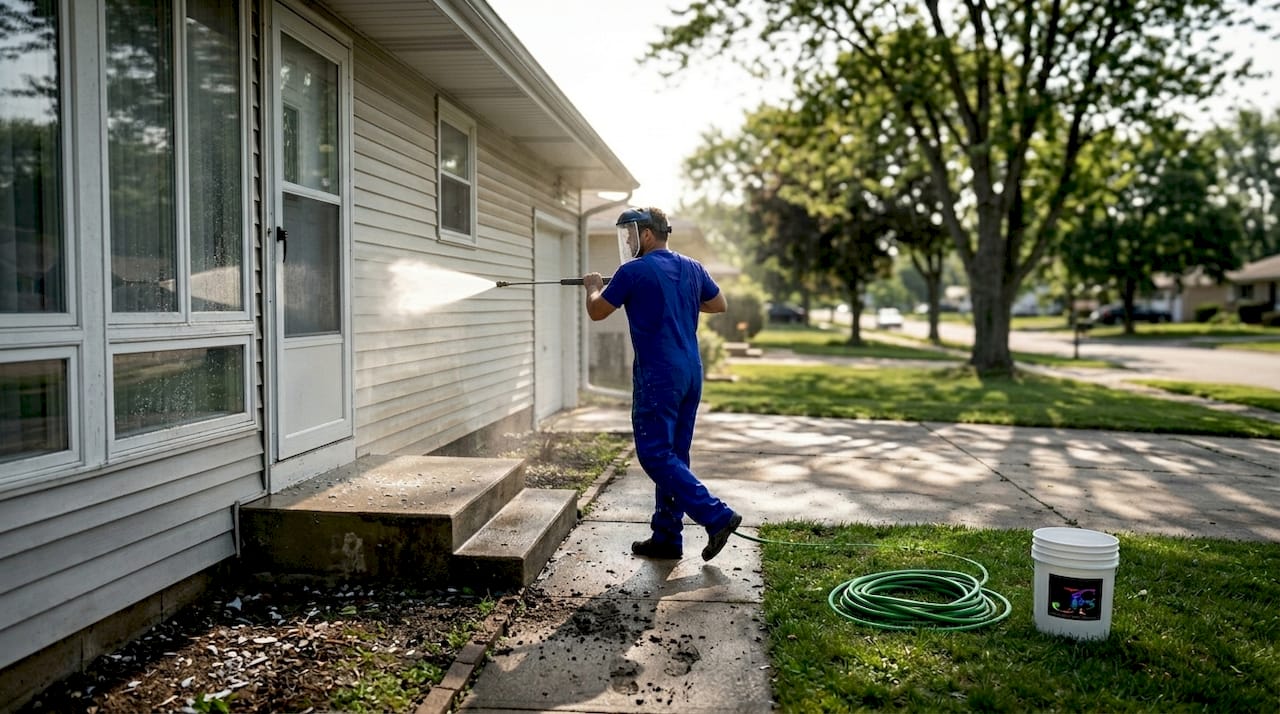
What happens during power washing for painting prep?
The actual process of power washing for painting prep is more structured than most people expect. It’s not just pointing a wand at the wall. Following the right sequence protects your home and produces a surface that paint can actually hold onto. Here’s what professional pressure washing steps typically look like in practice:
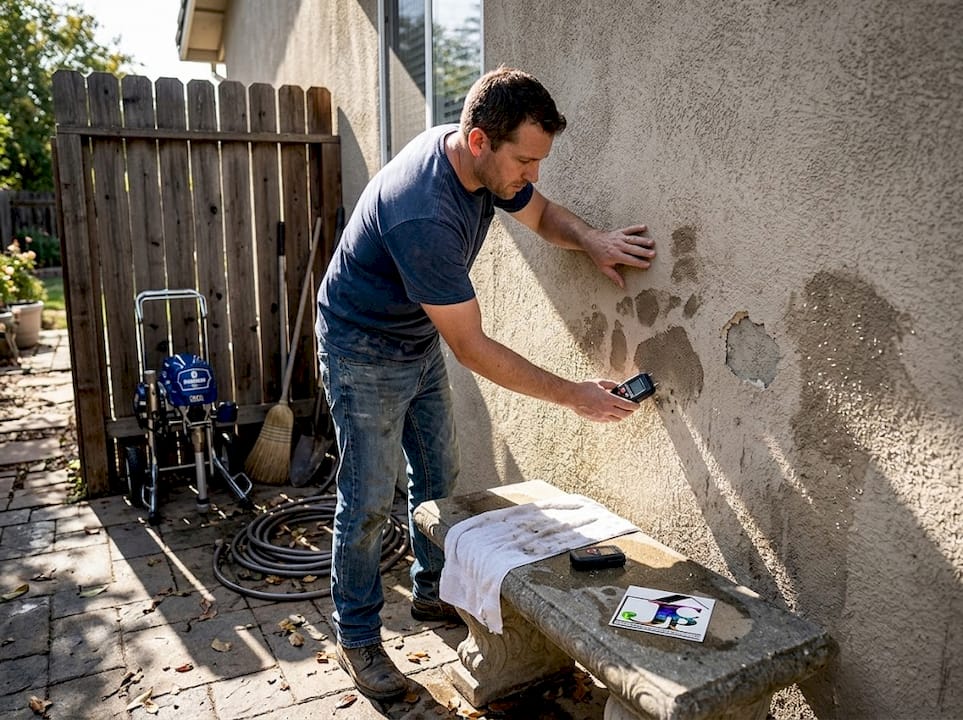
Inspect the exterior. Before anything gets wet, walk the perimeter and identify problem areas: cracked caulking, loose boards, damaged stucco, rust stains, or heavy mold patches. These areas need attention before or after washing to avoid driving moisture into compromised spots.
Protect surrounding elements. Cover electrical outlets, exterior light fixtures, and vents with waterproof tape or plastic sheeting. Move potted plants away from the work zone and cover landscaping that’s directly against the home’s foundation.
Apply detergent first. Start by applying the appropriate cleaning solution to the surface at low pressure. Allow it to dwell for five to ten minutes. This is the step most DIY washers skip, and it’s arguably the most important one.
Agitate tough spots. For areas with heavy mildew or caked-on grime, use a soft-bristle brush to scrub while the detergent is active. This is especially important on textured stucco common throughout LA neighborhoods.
Rinse with appropriate pressure. Wood siding and trim should be rinsed at lower pressure (around 500 to 800 PSI) to prevent splintering and water intrusion. Concrete, brick, and hardy surfaces can handle higher pressure (1,200 to 2,000 PSI). Always rinse from top to bottom to avoid driving dirty water over already-clean sections.
Allow full drying time. This is non-negotiable. Detergents and proper rinsing help remove residues that would otherwise stay trapped under new paint, but only if the surface is then given adequate time to fully dry before paint is applied.
Pro Tip: In Southern California, drying time can vary significantly by season. In dry summer months, 24 hours may be enough. During the rare rainy season or in shaded north-facing areas, give it a full 48 hours, or longer if you see any moisture sheen remaining.
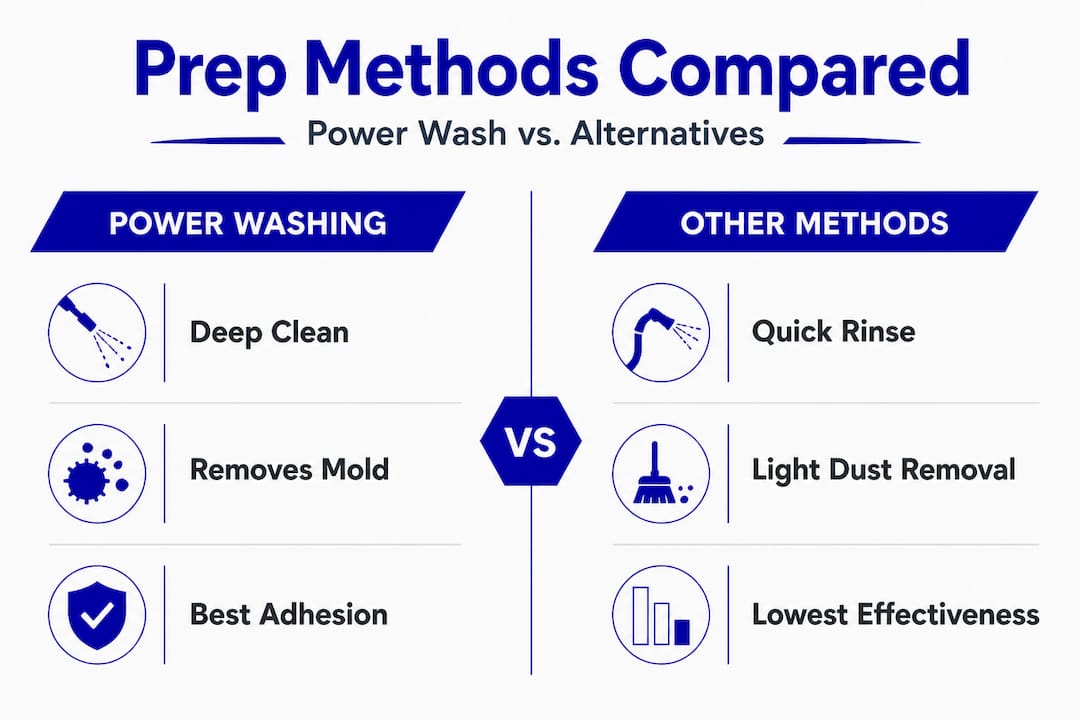
Comparing power washing to other surface prep methods
It’s fair to ask whether there are alternatives to power washing that get the job done. Here’s an honest look at how power washing stacks up against the most common options:
Method | Effectiveness | Time required | Best use case |
Garden hose rinsing | Low | Short | Light dust removal only |
Hand scrubbing with brush | Moderate | Very long | Small spot treatments |
Dry scraping | Low to moderate | Long | Loose paint removal only |
Chemical wash only | Moderate | Moderate | Mildew treatment on flat surfaces |
Power washing with detergent | High | Moderate | Full exterior prep before painting |
Combined power wash + scraping | Very high | Longer | Heavy buildup, peeling paint removal |
Garden hose rinsing, for example, simply doesn’t generate enough water velocity to dislodge embedded contamination. You’re moving surface dust around, not actually cleaning the material. Hand scrubbing is effective but impractical for anything larger than a small accent wall. For a full home exterior in Los Angeles, that approach would take days of exhausting labor.
Many professionals regard power washing with detergents as essential rather than optional when optimizing surface prep before exterior painting. The combination of mechanical force, chemical action from detergent, and thorough rinsing creates a surface profile that’s genuinely ready to accept paint.
That said, a combined approach is sometimes the smartest call. On older homes with multiple layers of existing paint, or on surfaces with heavy mold damage, power washing should be followed by hand scraping of any remaining loose paint, light sanding of rough edges, and spot priming. Following solid pro prep steps ensures each of these stages connects seamlessly.
Pro Tip: If you’re dealing with painted stucco that shows chalking, run your hand across the surface after washing and drying. If you still pick up powdery residue on your palm, the surface needs a penetrating primer before paint. That chalk is still undermining adhesion.
Tips for effective and safe power washing before painting
Whether you’re planning to rent a pressure washer and do it yourself or hire a professional team, these tips will keep the project on track and protect your home’s surfaces.
Match PSI to the material. Soft materials like wood, vinyl siding, and older stucco can be damaged by high pressure. Stick to lower PSI settings for these and save the power for concrete and masonry. When in doubt, test a small, inconspicuous area first.
Keep the nozzle moving. Holding the wand in one spot concentrates force and can gouge wood, strip caulking, or crack aged stucco. Maintain consistent motion and keep the nozzle at least 12 to 18 inches from the surface.
Use the right detergent. Not all cleaning solutions are appropriate for all surfaces. Trisodium phosphate (TSP) substitutes work well for heavy mildew and chalking on stucco. For wood surfaces, use a wood-safe cleaner that won’t raise the grain aggressively. Avoid bleach concentrations higher than 3 percent, as stronger solutions can damage paint-compatible surface fibers.
Hire professionals for multi-story or delicate exteriors. Working at height with a pressure washer is genuinely dangerous, and specialized equipment like extension wands and scaffolding can make the difference between a thorough clean and an inconsistent job. Consulting expert pressure washing advice can save you from costly mistakes.
Don’t rush the drying stage. Proper rinsing and drying time after washing are just as critical to superior paint results as the wash itself. Painting over a surface that’s still holding moisture internally will lead to blistering and adhesion failure, sometimes within months.
Plan your project schedule around washing. On a full exterior repaint, schedule power washing at least two to three days before your painting crew arrives. This builds in flexibility for unexpected delays and ensures the surface is fully ready.
If you’re unsure whether to tackle this step yourself, consider what’s at stake. A professional exterior paint job on a mid-size LA home represents a meaningful investment. It’s worth hiring a skilled painter who treats surface prep as seriously as the painting itself.
Why power washing is the step most DIY painters underestimate
Here’s what 16 years of exterior painting in Los Angeles has made crystal clear: the most common reason an exterior paint job fails isn’t the quality of the paint or the painter’s technique. It’s what was left on the wall before the first drop of paint ever touched it.
DIY painters tend to fixate on what they can see. They choose a great color, buy a respected paint brand, and invest in quality brushes and rollers. Then they give the walls a quick rinse, let them dry for a few hours, and get to work. The result looks fantastic on day one. By month eighteen, they’re seeing lifting edges and peeling patches and wondering what went wrong.
What went wrong was invisible. The mildew spores, the chalk layer, the airborne grease from nearby cooking facilities, the oxidized residue from previous paint cycles. All of it stayed on the surface because it was never properly removed.
Paint longevity is determined as much by invisible prep as by product choice or technique. That’s not a minor caveat. It’s the whole ballgame. Professional painters don’t debate whether to wash. They debate which detergent formulation is best for the specific surface type and contamination level they’re dealing with.
The economics here are also worth considering. A proper power wash with detergent, done right, might add one to two days to your project timeline and a relatively modest cost to your budget. In exchange, you can realistically expect your paint job to last eight to twelve years on exterior surfaces in Los Angeles rather than four to six. That’s potentially doubling the lifespan of your investment for a fraction of the total project cost.
If you want to see what properly prepared surfaces look like before and after painting, browsing stunning exterior painting techniques gives a real sense of what surface prep makes possible.
The bottom line: skipping power washing or shortcutting it isn’t a time-saver. It’s borrowing from your paint job’s future.
Get expert painting and surface prep in Los Angeles
Surface preparation, done with real care and the right tools, is what separates a paint job that fades and peels in a few years from one that still looks sharp a decade later. At Johnny’s Custom Painting, every exterior project starts with thorough preparation, including proper power washing, because we’ve seen what happens when that step is rushed or skipped.
If you’re ready to move forward with an exterior repaint in Los Angeles, browse our exterior residential painting gallery to see the quality we deliver on real homes. Whether you have a single-family residence or a multi-unit property, our team is ready to walk you through the process from first wash to final coat. Reach out to your trusted Los Angeles painting contractor today for a free estimate and a conversation about what your home actually needs.
Frequently asked questions
Is power washing always required before painting?
Power washing is strongly recommended for most exterior projects, as paint adhesion is strongly affected by microscopic contamination layers that build up on surfaces over time. Skipping it substantially increases the risk of premature paint failure.
How long should you wait to paint after power washing?
Surfaces should be allowed to dry for at least 24 to 48 hours after power washing before any paint is applied, since proper drying time is essential to prevent moisture-related adhesion problems. Shaded or north-facing surfaces may need additional drying time beyond 48 hours.
Can you use just water, or is detergent necessary?
Using detergent ensures thorough removal of tough contaminants like mildew and chalk, which water alone may miss, because detergents and proper rinsing are required to remove organic growth and residue at the surface level. Plain water provides mechanical force but lacks the chemical action needed to break down biological growth.
Is power washing safe for all home exteriors?
Power washing is safe with proper technique, but certain materials require low pressure and careful handling to avoid damage, since proper washing technique matters significantly when working on softer surfaces like wood, older stucco, or vinyl siding. When unsure, always test a small area first or hire a professional.
Recommended
Comments