
Creative cabinet painting ideas to transform your kitchen
- Jonathan Hernandez
- Mar 26
- 9 min read

Choosing the right cabinet painting idea can feel overwhelming with so many styles, colors, and finishes available. Your kitchen cabinets define the room’s character and significantly impact your home’s value, so selecting a look that balances aesthetics with durability matters. This guide walks you through practical criteria for evaluating cabinet painting ideas, explores popular creative styles, compares finishes and techniques, and helps you prepare for a successful transformation that elevates your kitchen’s appeal.
Table of Contents
Key Takeaways
Point | Details |
Durability and style fit | When choosing cabinet painting ideas, consider daily usage and design language to balance long lasting protection with the home look. |
Test samples in situ | Test paint on actual cabinet doors and view under different lighting to confirm color in all conditions before committing. |
Low VOC options | Prioritize low or zero VOC paints to protect indoor air quality without sacrificing coverage or color vibrancy. |
Two tone schemes add height | Two tone cabinets create visual interest and can make the kitchen feel taller and more dynamic. |
Professional finishes offer value | Hiring professionals can deliver smoother finishes, better durability, and time savings compared to DIY approaches. |
Criteria for choosing your cabinet painting idea
Selecting the right cabinet painting approach requires evaluating several practical factors that affect both appearance and longevity. Your kitchen’s daily usage patterns should drive your paint selection, especially if you cook frequently or have young children who create messes. High-traffic kitchens demand durable paint options that withstand repeated cleaning without chipping or fading.
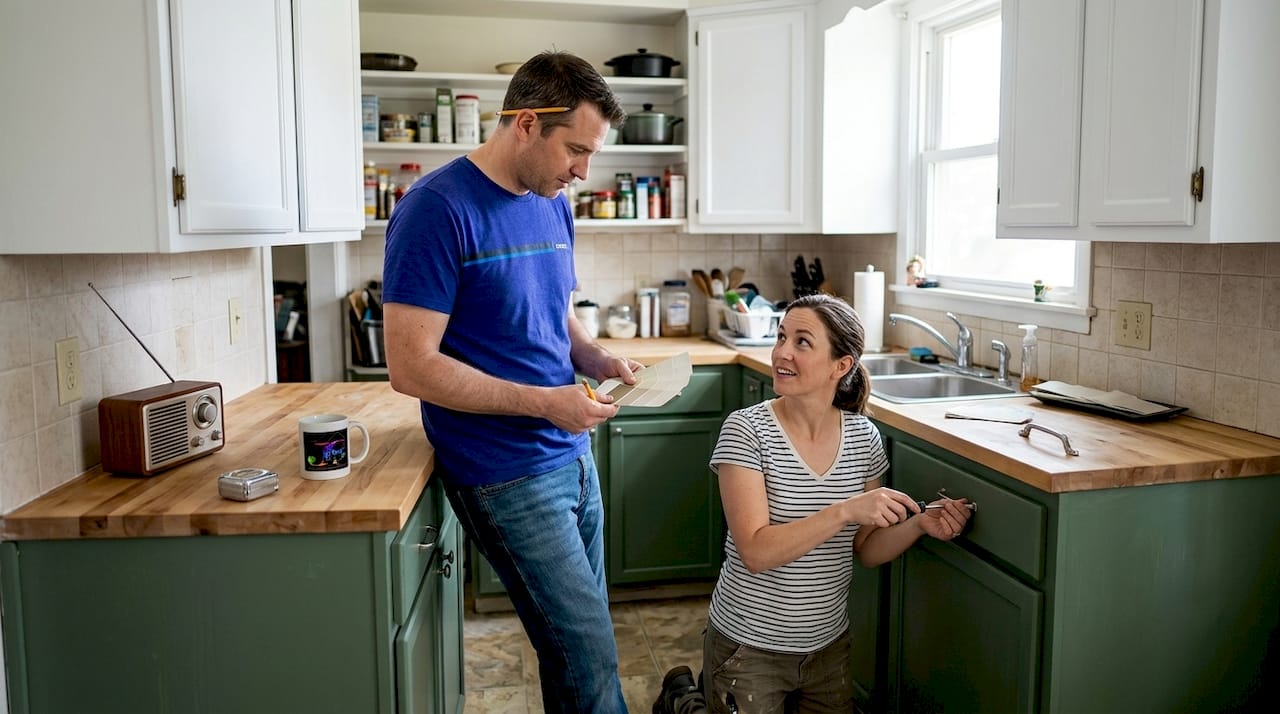
Style compatibility extends beyond personal taste to include your home’s overall design language. Modern minimalist homes pair well with sleek monochromatic cabinets, while traditional spaces often benefit from warm, classic tones. Consider how your cabinet color will interact with existing countertops, backsplashes, and flooring since replacing these elements costs significantly more than repainting.
Paint finish selection directly impacts both visual appeal and practical maintenance. Glossier finishes reflect more light and resist moisture better, making cleanup easier after cooking splatters. Matte finishes hide surface imperfections beautifully but show fingerprints and grease more readily, requiring gentler cleaning methods that take more time.
Eco-conscious homeowners should prioritize low-VOC or zero-VOC paint formulations that minimize harmful emissions during and after application. These paints protect indoor air quality without sacrificing coverage or color vibrancy, particularly important in kitchens where families spend considerable time. Many professional contractors now offer these healthier alternatives as standard options.
Budget considerations extend beyond paint costs to include preparation materials, tools, and potential labor expenses. DIY projects save money upfront but demand significant time investment and skill development. Professional painters bring specialized equipment like HVLP sprayers that create factory-smooth finishes difficult to replicate with brushes or rollers, often justifying their cost through superior results and time savings.
Pro Tip: Test paint samples on actual cabinet doors rather than small swatches. View them at different times of day under natural and artificial lighting to see how the color shifts, ensuring you love the shade in all conditions before committing to the full project.
Top cabinet painting ideas and styles for your kitchen
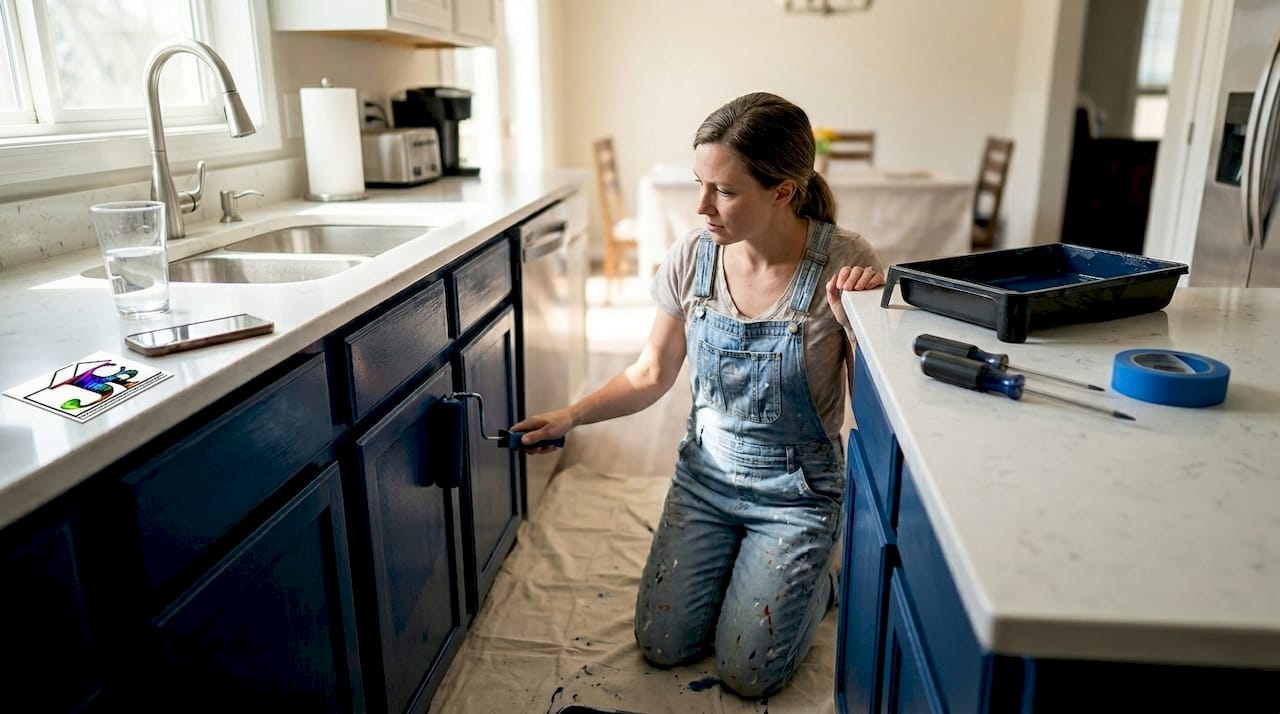
Bold, saturated colors have surged in popularity as homeowners embrace personality-driven kitchen designs. Navy blue cabinets create sophisticated depth while maintaining versatility across traditional and contemporary spaces. Forest green brings organic warmth that pairs beautifully with brass hardware and natural wood accents. Matte black delivers dramatic impact in modern kitchens, especially when contrasted with white countertops or light-colored walls.
Two-tone cabinet schemes offer visual interest by mixing lighter upper cabinets with darker base cabinets. This approach makes kitchens feel taller by drawing the eye upward while grounding the space with rich lower tones. Popular combinations include white uppers with charcoal gray lowers, or cream uppers paired with sage green bases that balance brightness with earthy warmth.
Classic white or cream cabinets remain timeless choices that brighten kitchens and create flexible backdrops for changing decor. These neutral palettes make small kitchens feel more spacious and allow colorful accessories or artwork to take center stage. Off-white shades like ivory or bone add subtle warmth compared to stark white, preventing the sterile feeling some homeowners want to avoid.
Distressed or antiqued finishes suit farmhouse, cottage, or rustic kitchen styles by adding character through intentional wear patterns. Techniques like dry brushing, glazing, or sanding edges create aged appearances that hide future dings and scratches naturally. These finishes work especially well on raised-panel or Shaker-style cabinet doors where details can be highlighted.
High-gloss lacquer finishes deliver sleek, contemporary sophistication with mirror-like surfaces that reflect light dramatically. This ultra-modern look requires flawless surface preparation since glossy finishes amplify every imperfection. The payoff includes stunning visual impact and extremely easy cleaning, as grease and grime wipe away effortlessly from the smooth, non-porous surface.
Comparing cabinet paint finishes and techniques
Understanding paint finish options helps you balance aesthetic preferences with practical kitchen demands. Matte finishes offer sophisticated, velvety appearances that hide minor surface flaws and create contemporary, understated elegance. However, they absorb stains more readily and require gentle cleaning with non-abrasive products, making them less ideal for heavy-use kitchens where spills happen frequently.
Satin finishes strike an excellent middle ground with subtle sheen that resists moisture and cleans more easily than matte while avoiding the high reflectivity of glossier options. This finish suits most kitchen styles and usage patterns, providing durability without overwhelming visual shine. Satin works particularly well in transitional kitchens that blend traditional and modern elements.
Semi-gloss finishes deliver noticeable sheen that bounces light around the kitchen while offering superior stain resistance and cleaning ease. This finish choice makes sense for busy families who need cabinets that withstand daily wear and frequent wiping. The reflective quality can highlight surface imperfections, so proper preparation becomes even more critical with semi-gloss applications.
Gloss finishes create the most dramatic, light-reflective surfaces with almost lacquer-like shine that defines ultra-modern kitchens. These finishes provide maximum durability and the easiest cleaning but demand absolutely perfect surface preparation since they reveal every flaw mercilessly. Professional application becomes nearly essential for achieving flawless gloss results.
Finish type | Sheen level | Durability | Cleaning ease | Best for |
Matte | Minimal | Moderate | Requires gentle care | Low-traffic, contemporary kitchens |
Satin | Subtle | Good | Easy maintenance | Most kitchen styles and usage levels |
Semi-gloss | Noticeable | Excellent | Very easy cleaning | High-traffic, family kitchens |
Gloss | High | Superior | Effortless wiping | Modern kitchens with perfect prep |
Application techniques significantly impact final results beyond finish selection. Spray painting creates the smoothest, most professional-looking surfaces by eliminating brush marks and roller stipple entirely. HVLP sprayers reduce overspray while delivering even coverage that’s nearly impossible to achieve manually, though they require masking off surrounding areas carefully and proper ventilation.
Brush and roller application offers more control for DIY painters and works well for smaller projects or touch-ups. Quality brushes minimize visible strokes when using proper technique, while foam rollers create smoother results than traditional nap rollers on flat cabinet surfaces. This method takes longer but requires less extensive preparation of the surrounding kitchen space.
Choosing low-VOC paint formulations protects your family’s health during and after the painting process. These environmentally responsible options have become widely available across all finish types without compromising coverage or color selection. Professional painters increasingly stock these products as standard offerings, recognizing growing consumer demand for safer materials.
Pro Tip: Always apply a high-quality primer designed specifically for cabinets before your topcoat, regardless of finish choice. Primer creates better paint adhesion, blocks stains from bleeding through, and reduces the number of topcoat layers needed for full coverage, ultimately saving time and money.
How to decide and prepare for your cabinet painting project
Successfully transforming your kitchen cabinets starts with honest project scope assessment. Measure your total cabinet surface area and count doors, drawer fronts, and fixed panels to estimate material quantities accurately. Consider your available time realistically, as rushing through preparation or applying paint too quickly leads to poor results that require costly correction.
Proper preparation determines final quality more than any other factor in cabinet painting. Follow these essential steps for professional results:
Remove all cabinet doors, drawer fronts, and hardware, labeling each piece for easy reinstallation
Clean every surface thoroughly with degreaser to eliminate cooking oils and grime that prevent paint adhesion
Sand all surfaces with 150-grit sandpaper to create texture for primer bonding, then wipe clean with tack cloths
Fill any dents, scratches, or holes with wood filler, allowing complete drying before sanding smooth
Apply quality primer in thin, even coats, letting each layer dry completely before proceeding
Sand lightly between primer and paint coats with 220-grit paper for ultra-smooth finishes
Apply paint in multiple thin coats rather than fewer thick ones to prevent drips and ensure durability
Deciding between DIY execution and professional hiring depends on several factors beyond budget alone. DIY makes sense if you possess painting experience, own or can rent necessary equipment, and have flexible time to work carefully without rushing. The learning curve can be steep, and mistakes on visible kitchen cabinets prove more frustrating than on less prominent surfaces.
Professional cabinet painters bring specialized expertise that shows in finished quality and longevity. They understand proper surface preparation techniques, maintain ideal environmental conditions during application, and use commercial-grade equipment that creates superior results. The time savings alone often justifies professional costs, especially for homeowners with demanding schedules who can’t dedicate weeks to a painting project.
Consulting with experienced painting contractors provides valuable insights even if you ultimately choose DIY. Many professionals offer free estimates that include specific recommendations for your kitchen’s unique conditions, finish options suited to your style, and realistic timelines. This expert input helps you make informed decisions and avoid common pitfalls that compromise results.
“The difference between good and great cabinet painting comes down to preparation patience. Rushing through cleaning, sanding, and priming stages guarantees disappointment, while investing time in proper prep work ensures stunning, durable results that transform your kitchen for years.”
Maintaining painted cabinets extends their beautiful appearance and protects your investment. Wipe spills immediately to prevent staining, especially with matte finishes. Use gentle, non-abrasive cleaners and soft cloths rather than scrubbing pads that can dull or scratch painted surfaces. Touch up small chips or scratches promptly before they expand, keeping leftover paint properly sealed for future needs.
Regular hardware inspection prevents loose handles or hinges from causing damage when doors swing awkwardly. Tighten screws periodically and consider adding soft-close mechanisms that prevent slamming impacts. These simple maintenance habits keep your freshly painted cabinets looking pristine far longer than neglected ones.
Explore comprehensive interior painting guidance to complement your cabinet project with coordinated wall colors, trim updates, or ceiling refreshes that create cohesive kitchen transformations. Coordinating these elements amplifies the impact of your cabinet painting investment.
Enhance your kitchen with expert cabinet painting services
Transforming your kitchen cabinets from outdated to outstanding requires skill, patience, and professional-grade techniques that deliver lasting beauty. When you’re ready to move beyond inspiration to implementation, partnering with experienced specialists ensures your vision becomes reality with flawless execution.

Discover how expertly painted cabinets can revolutionize your kitchen’s entire atmosphere by exploring our interior residential painting portfolio showcasing completed transformations across Los Angeles homes. Our expert cabinet painting services combine 16 years of industry experience with eco-friendly materials and meticulous attention to detail that creates stunning, durable results. As a top-rated Los Angeles painting contractor, we specialize in helping homeowners achieve their kitchen dreams through professional craftsmanship, transparent communication, and commitment to exceeding expectations. Schedule your free consultation today to discuss your cabinet painting ideas and receive personalized recommendations tailored to your home’s unique style and your family’s practical needs.
Frequently asked questions
What is the best paint finish for kitchen cabinets?
Semi-gloss or satin finishes balance durability with ease of cleaning, making them popular choices for kitchen cabinets that face daily use. These finishes resist moisture and grease while providing attractive sheen that enhances cabinet details. Matte finishes offer sophisticated aesthetics but require gentler cleaning and suit lower-traffic kitchens better, as they show fingerprints and stains more readily than glossier options.
How long does a cabinet painting project typically take?
Most cabinet painting projects take between 3 to 7 days depending on kitchen size, number of cabinets, and drying time requirements between coats. Professional painters often complete projects faster using specialized spray equipment and controlled drying conditions that accelerate the process. DIY projects typically extend longer as homeowners work around other commitments and may lack professional tools that speed application and curing.
Can I paint kitchen cabinets myself or should I hire a professional?
DIY cabinet painting can save money but requires significant time investment, proper tools, and skill to achieve quality results that last. Success depends on meticulous surface preparation, patient application of multiple thin coats, and ideal environmental conditions during painting and curing. Professional painters deliver smoother finishes and handle complex preparation work efficiently, often justifying their cost through superior durability and time savings. Review comprehensive interior painting tips to understand the full scope before deciding which approach suits your situation.
Do I need to remove cabinet doors before painting?
Removing cabinet doors, drawer fronts, and hardware before painting produces dramatically better results than painting in place. This allows you to paint all surfaces evenly, prevents drips from vertical application, and enables proper drying without dust settling on wet paint. Painting removed components horizontally on sawhorses or tables creates smoother finishes and lets you work more comfortably without awkward angles that cause application mistakes.
How do I choose cabinet colors that won’t look dated quickly?
Classic neutrals like white, cream, gray, and navy blue tend to remain stylish across changing trends while offering flexibility for future decor updates. Consider your home’s architectural style and existing finishes when selecting colors, ensuring harmony rather than fighting against permanent elements. Test large samples in your actual kitchen lighting before committing, and remember that quality execution matters more than trendy colors, as even bold choices look timeless when applied beautifully.
Recommended
Comments