
What is paint adhesion: A homeowner's guide
- Jonathan Hernandez
- May 17
- 9 min read

TL;DR:
Paint adhesion is the strong bond between a cured paint film and the underlying surface, resisting peeling and flaking over time. Proper surface preparation, including cleaning, sanding, and using the right primer, is essential to achieve lasting adhesion; neglecting these steps often causes paint failure. Professionals evaluate adhesion through standardized tests like ASTM D3359, ensuring quality and durability for your home project.
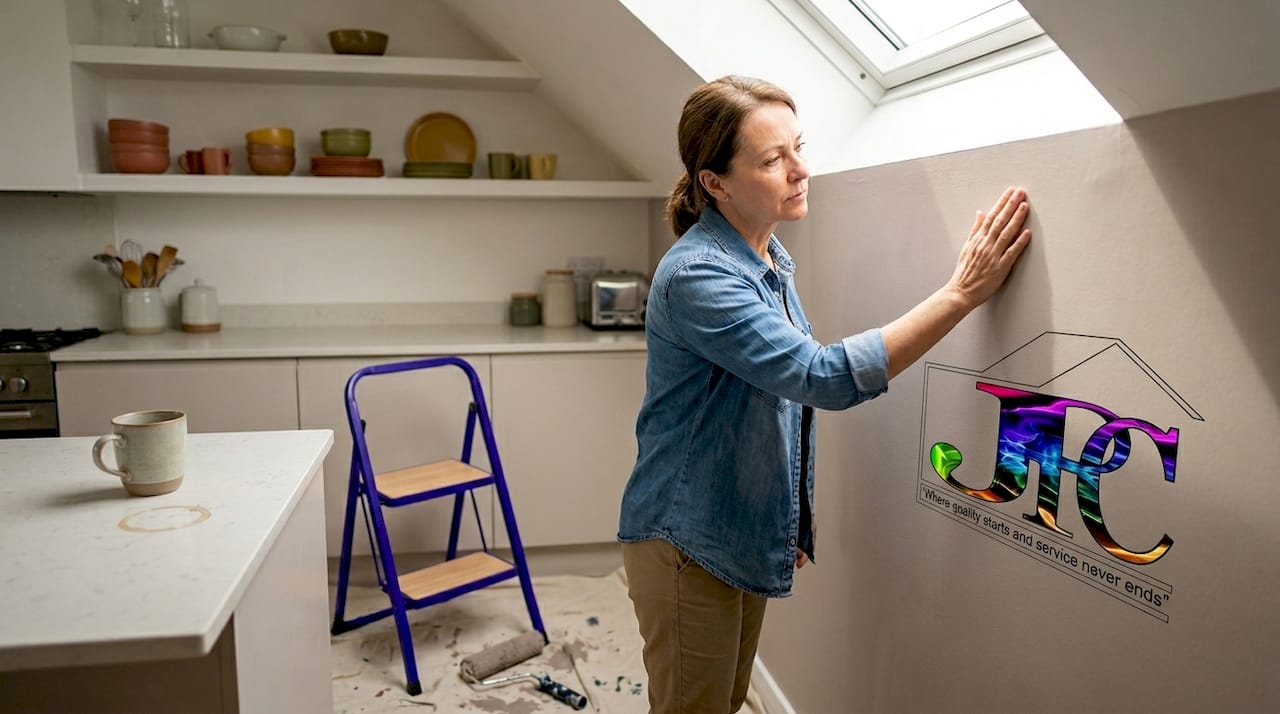
You cleaned the wall, let it dry, and applied a fresh coat of paint. Six months later, the edges are lifting and whole sections are peeling. Sound familiar? That frustration is almost always rooted in one overlooked concept: paint adhesion. Most homeowners assume a clean surface is a ready surface, but paint adhesion involves a chain of factors that go far beyond wiping things down. This guide breaks down exactly what paint adhesion is, why it fails, how professionals test it, and what you can do before your next interior or exterior painting project to make sure the results actually last.
Table of Contents
How paint adhesion works: Wetting, surface energy, and bonding
Common causes of paint adhesion failure and how to avoid them
How paint adhesion is tested: Standards and what homeowners should know
Ensuring strong paint adhesion for your home projects: Practical steps
A fresh look on paint adhesion: Why most DIYers get it wrong and how to fix it
Trust Johnny’s Custom Painting for expert adhesion and flawless finishes
Key Takeaways
Point | Details |
Paint adhesion defined | It is the strength of the bond between paint and surface that prevents peeling and flaking. |
Wetting is vital | Paint must spread and penetrate the surface to form a strong mechanical and chemical bond. |
Surface preparation matters | Cleaning alone is not enough; surface energy and roughness also affect adhesion. |
Failure has multiple causes | Contamination, curing issues, and incompatible layers can all cause adhesion failure. |
Professional techniques help | Proper preparation, testing, and timing ensure durable paint adhesion for your home. |
The basics of paint adhesion: What it really means
Paint adhesion is not just about paint “sticking.” It is a measure of how strongly a cured paint film bonds to the surface beneath it and resists being pulled away. Coating adhesion is the resistance of a cured paint film to mechanical removal from a specific substrate, meaning how firmly the coating grips the surface and refuses to let go. That definition changes how you should think about every step of a painting project.
A paint job is not just a visual finish. It is a layered system where every component must bond to the one beneath it. Here is what strong paint adhesion actually delivers for your home:
Resistance to peeling and flaking even after years of exposure
Flexibility that allows the paint film to move slightly with the surface as temperature changes
Weather protection on exterior surfaces against rain, UV rays, and humidity
Corrosion resistance on metal surfaces like gutters, railings, and window frames
Strong intercoat bonding between primer, base coat, and topcoat in multi-layer systems
That last point is one most homeowners never consider. Even if the primer sticks perfectly to your wall, a topcoat that does not bond to the primer will fail. Paint adhesion is not just about the first layer. It runs through the entire system.
How paint adhesion works: Wetting, surface energy, and bonding
Now that you understand why adhesion matters, let’s look at what actually happens at the surface level when paint is applied. The process starts before the paint dries and depends on physics most people never think about.
The first step is wetting. When liquid paint hits a surface, it needs to spread out and make complete, even contact with every small cavity and texture in the material. Good paint adhesion depends first on this wetting process, where the liquid paint spreads and contacts the substrate, then penetrates surface cavities to mechanically anchor after curing. Think of it like pressing a sticker onto a dusty window versus a clean, slightly textured one. The sticker grips the texture but slides right off the contaminated surface.
The second factor is surface energy. Every material has a measurable surface energy that affects how well liquids spread across it. Adhesive forces need to dominate for proper bonding, meaning the surface energy of the material must be higher than the paint’s surface tension to achieve wetting, and any contamination reduces adhesion. This is why some plastics are notoriously hard to paint. They have low surface energy, so paint beads up rather than spreading out.
Here is a quick breakdown of the forces at work:
Adhesion forces: The attraction between paint molecules and the surface molecules beneath them
Cohesion forces: The internal attraction between paint molecules to each other
Surface energy: The property of the substrate that determines how easily paint wets it
Contamination effect: Oils, dust, and wax sit between paint and surface, blocking molecular contact entirely
Pro Tip: If water beads up on a surface you are about to paint, that is a visual warning that surface energy is low and paint will likely not bond well either. That surface needs treatment before painting.
Common causes of paint adhesion failure and how to avoid them
Understanding what causes adhesion to fail puts you in control. These are not rare or exotic problems. They happen on homes across Los Angeles every year.
Adhesion failure happens when the coating does not form a true bond because of contamination, low surface energy, poor wetting, improper curing, and intercoat mismatch. Let’s translate that into real-world scenarios you will recognize.
Contamination. Cooking grease on kitchen walls, sunscreen residue on bathroom surfaces, or even fingerprints from handling a surface can block proper bonding. Standard wiping often spreads oils rather than removing them.
Low surface energy surfaces. Some plastics, previously painted surfaces with certain sheens, and treated wood resist paint adhesion without special prep. Cleaning alone will not guarantee adhesion if the surface has low surface energy, so treatments that raise surface energy may be necessary.
Skipping or using the wrong primer. Primer is not optional on tricky surfaces. It bridges the chemical gap between your topcoat and the substrate.
Applying paint over an incompletely cured previous coat. Paint that feels dry to the touch is not the same as paint that has fully cured. Applying a second coat too soon traps solvents and weakens intercoat adhesion.
Applying paint in poor conditions. Painting in direct Los Angeles afternoon sun, in high humidity, or when temperatures are extreme affects how paint cures and bonds.
“One of the most common calls we get is from homeowners who repainted over glossy walls without sanding first. The new paint technically goes on fine. Then summer comes, and it starts peeling in sheets.”
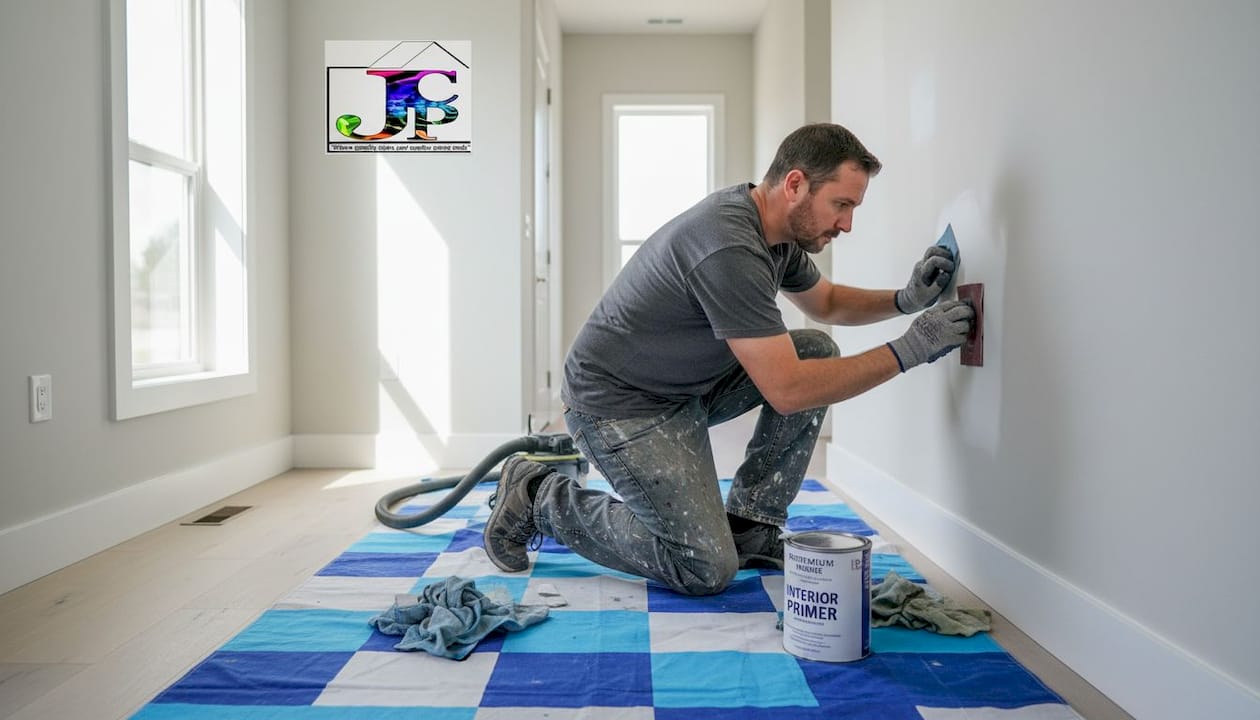
Thoroughly prepping your walls before painting is not a bonus step. It is the step. For exterior work, power washing removes years of grime, chalk, and biological growth that would kill adhesion before the brush even touches the wall.
Pro Tip: On any previously painted glossy surface, light sanding with 120-grit sandpaper before reprinting is one of the highest-return prep moves you can make. It costs 15 minutes and can add years to the paint job.
How paint adhesion is tested: Standards and what homeowners should know
Knowing how adhesion is tested helps you ask the right questions when hiring painters and evaluate the quality of a finished job. The most widely used standard is ASTM D3359, and it is simpler than it sounds.
ASTM D3359 uses a crosshatch pattern of cuts made through the paint film, tape applied firmly over the cuts, then pulled away. The amount of paint removed determines the adhesion rating on a scale from 0 to 5.
Rating | What it means | Paint removed |
5B | Excellent adhesion | None |
4B | Very good | Less than 5% |
3B | Good | 5 to 15% |
2B | Fair | 15 to 35% |
1B | Poor | 35 to 65% |
0B | Complete failure | More than 65% |
A few things affect whether you can trust the result:
Blade sharpness matters. A dull blade drags rather than cuts cleanly, skewing results.
Tape type and application pressure must match the standard. Using the wrong tape gives misleading numbers.
Cure state is critical. Testing paint that has not fully cured will always show worse adhesion than the finished product will actually have.
Most homeowners will not run this test themselves, but knowing it exists and what the ratings mean helps you have a real conversation with your painting contractor. A professional who knows ASTM D3359 and can explain it to you is a professional who takes adhesion seriously.
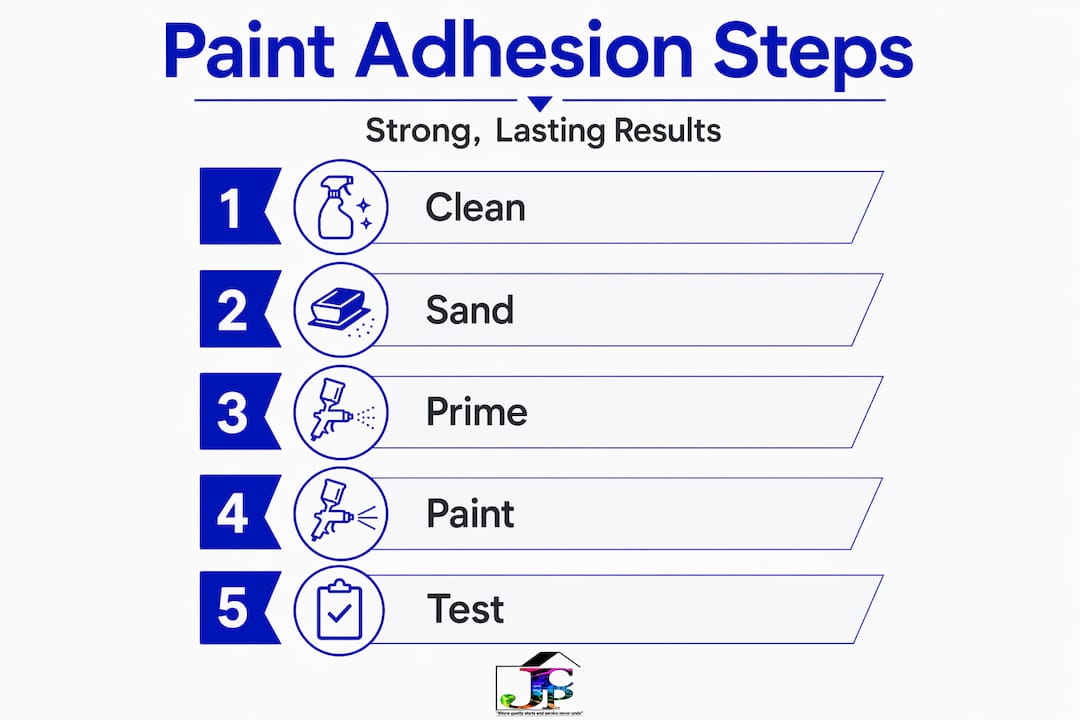
Ensuring strong paint adhesion for your home projects: Practical steps
These are the steps that actually move the needle on adhesion, organized by what to do and when.
Before you paint:
Clean all surfaces with a degreaser, not just water, to remove oils and residues
Sand glossy surfaces to give paint a mechanical “tooth” to grip
Use proper surface preparation techniques specific to your substrate, whether that is wood, stucco, concrete, or previously painted drywall
For low-energy surfaces like PVC trim or certain plastics, use a bonding primer or adhesion promoter
Check that all fillers and patches are fully cured and sanded flush before priming
When you apply paint:
Apply primer first, matched to both your substrate and your finish coat
Allow full cure time between coats, not just dry-to-touch time
Paint when temperatures are between 50°F and 85°F and humidity is below 70%
Apply thin, even coats rather than heavy single coats
For exterior projects in Los Angeles, choose paints with UV resistance rated for Southern California sun intensity
Choosing the right products:
Proper surface preparation and surface treatment depend on substrate type, whether metal, wood, plastic, or glass, and each requires a different approach to maximize adhesion. Using a premium primer designed for your specific substrate is not upselling. It is the difference between a paint job that lasts three years and one that lasts twelve.
Pro Tip: Ask your paint supplier for the technical data sheet on any primer you use. It will list compatible topcoats, required dry and cure times, and surface prep requirements. Five minutes reading that sheet saves hours of rework later.
For guidance specific to your home type and local conditions, LA homeowner painting tips can help you make better material decisions before the project starts.
A fresh look on paint adhesion: Why most DIYers get it wrong and how to fix it
Here is the uncomfortable truth: most DIY paint failures are not paint failures. They are adhesion failures that were built in from the first hour of the project, long before the roller touched the wall.
The problem is mental framing. Homeowners think of painting as a surface task. Clean it, paint it, done. But adhesion is a system-level issue involving surface prep, surface energy, contamination, curing, formulation, intercoat bonding, and mechanical stress. Every one of those variables has to work together. Miss one, and the whole system is weaker.
We see this play out constantly in Los Angeles. A homeowner spends a weekend painting their stucco exterior beautifully. Two summers later, the sun-facing walls are blistering and peeling because the surface was not properly cleaned of chalky residue before painting, and the primer selected was not rated for stucco in high-UV environments. The paint did not fail. The system failed.
What professionals bring to a job is not just technique. It is sequential thinking: what does this substrate need? What product is compatible with the primer I am using? Is the temperature right today? Has the previous coat cured long enough? Those questions are second nature on a professional job site. For a DIYer on a Saturday morning, they are the details that get skipped.
The fix is not to become a paint chemist. It is to treat the preparation phase as the majority of the work, not the warm-up. Systematic surface preparation is where paint jobs are won or lost. The actual painting is almost the easy part. Invest your time and attention at the start, and the finish will take care of itself.
Trust Johnny’s Custom Painting for expert adhesion and flawless finishes
Now that you understand what paint adhesion is and how much it affects the life of your paint job, the next step is working with a team that has built adhesion best practices into every project they take on.

At Johnny’s Custom Painting, our 16-plus years of experience in Los Angeles means we have painted in every condition this city throws at a surface, from sun-baked stucco in the Valley to salt-air exposed wood in coastal neighborhoods. We treat surface prep as the foundation of every project, using degreasing, sanding, priming, and proper cure windows before a single topcoat goes on. Browse our interior and exterior project portfolio to see how that commitment shows up in real finishes, or explore our exterior residential painting work to see how we handle the toughest adhesion challenges. Contact us for a free estimate and consultation tailored to your home.
Frequently asked questions
What does paint adhesion mean?
Paint adhesion is the strength of the bond between a cured paint film and the surface it was applied to, determining how well it resists peeling or flaking over time. It is measured by how strongly the coating grips the substrate and resists mechanical removal.
Why is my paint peeling even after cleaning the surface?
Cleaning removes loose dirt, but it does not always fix the underlying issue. Cleaning alone will not guarantee adhesion when the surface has low surface energy, meaning paint cannot wet and bond to it properly without additional treatment.
How can I test paint adhesion on my home walls?
The standard method is the ASTM D3359 crosshatch tape test, where cuts are made through the paint film, tape is pressed over them and pulled away, and the amount of paint removed is rated from 0 (complete failure) to 5 (no removal).
What surface preparation is needed for good paint adhesion?
Strong adhesion requires thorough cleaning with a degreaser, sanding or etching to create surface texture, and applying a primer matched to your substrate. Proper surface preparation varies depending on whether you are painting wood, metal, plastic, or masonry.
Can I improve paint adhesion on plastic or difficult surfaces?
Yes, but standard primers are usually not enough. Surfaces with low surface energy, like PVC or certain treated materials, need treatments to raise surface energy through bonding primers, adhesion promoters, or in industrial cases, plasma or flame treatment, before paint will bond reliably.
Recommended
Comments