
How to minimize disruption during home painting projects
- Jonathan Hernandez
- 3 days ago
- 10 min read
TL;DR:
Proper preparation, containment, and cleanup strategies significantly minimize home disruption during painting projects. Sealing HVAC vents, using barriers, and staging meticulous dust control work best to contain messes and keep living spaces livable. Success relies on following each step thoroughly, avoiding shortcuts that cause more work and chaos later.
Painting your home should feel exciting, not like surviving a construction zone for two weeks. Most Los Angeles homeowners who’ve lived through a messy paint job remember the dust on every surface, the paint smells seeping into the kitchen, and the furniture shoved awkwardly into hallways for days on end. The good news is that disruption during painting is almost entirely preventable when you follow the right sequence: preparation, containment, cleanup, and verification. This guide walks you through each stage with practical, field-tested strategies that professional painters use to keep your home livable from start to finish.
Table of Contents
Key Takeaways
Point | Details |
Dust containment is critical | Sealing off vents and doors keeps dust and debris from spreading throughout your home. |
Prep and protection pay off | Setting up barriers and mats before painting drastically reduces disruption and mess. |
Use layered cleanup steps | Routine vacuuming during the project and a final wipe ensure your space returns to normal quickly. |
Shortcuts increase mess | Skipping containment or cleanup steps leads to more disruption than you expect. |
Understand the main causes of disruption
Before you can fix a problem, you need to know exactly what’s causing it. When it comes to painting projects, three culprits are responsible for most of the chaos: airborne dust, stray paint, and blocked pathways. Understanding each one lets you target your prevention efforts where they’ll have the biggest impact.
Dust is by far the most persistent disruptor. Sanding walls, scraping old paint, and even applying new coats all release fine particles into the air. Once airborne, those particles travel far. The sneaky part is that your HVAC system actively makes this worse. When the air handler is running, it pulls particles from the work zone and redistributes them to every room in the house. Containing dust at its source by turning off your HVAC system and sealing every supply and return vent is the single highest-impact step you can take before work begins.
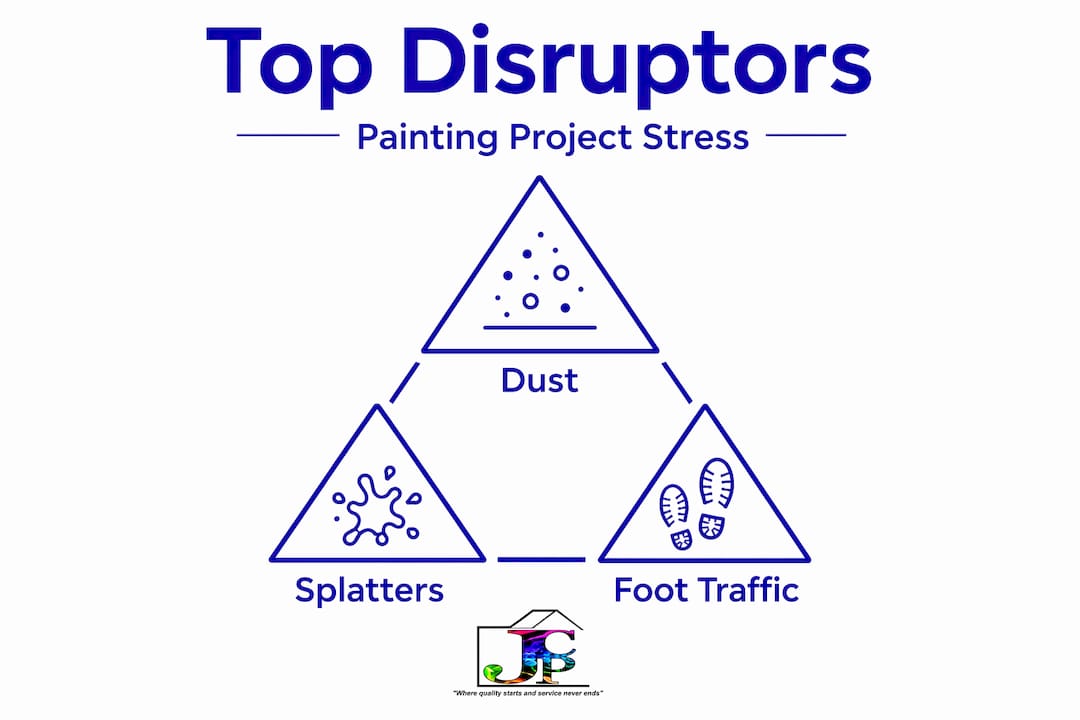
Paint splatters and drips are the second major disruptor. Even careful painters produce overspray, especially when rolling textured surfaces or spraying cabinets. Droplets land on floors, baseboards, and nearby furniture, and if they dry before anyone notices, removal becomes a project of its own.
Foot traffic rounds out the top three. Painters moving between rooms, stepping on drop cloths, and tracking dust or paint pigment onto clean flooring is one of the most overlooked sources of whole-home mess.
Here’s a quick overview of the main disruptors and their reach:
Disruptor | Primary cause | Spread potential |
Airborne dust | Sanding, scraping, dry application | Whole home via HVAC |
Paint splatters | Rolling, brushing, spraying | Room-level spread |
Foot traffic | Painter movement | Adjacent rooms and hallways |
Paint fumes | Solvent or low-VOC paint application | Whole home via air gaps |
The primary disruptors to address before day one include:
Dust generated by surface preparation
Paint fumes and VOCs lingering in living spaces
Blocked walkways and access points
HVAC-driven particle spread
If you want a broader look at how surface prep ties into painting success, this set of flawless painting tips covers the connection well. And if you’re watching your budget while managing the process, these cost-saving painting tips for Los Angeles homes are worth reviewing before you schedule your project.
Now that you’ve seen the big-picture challenges, let’s break down how to prepare your home to tackle them efficiently.
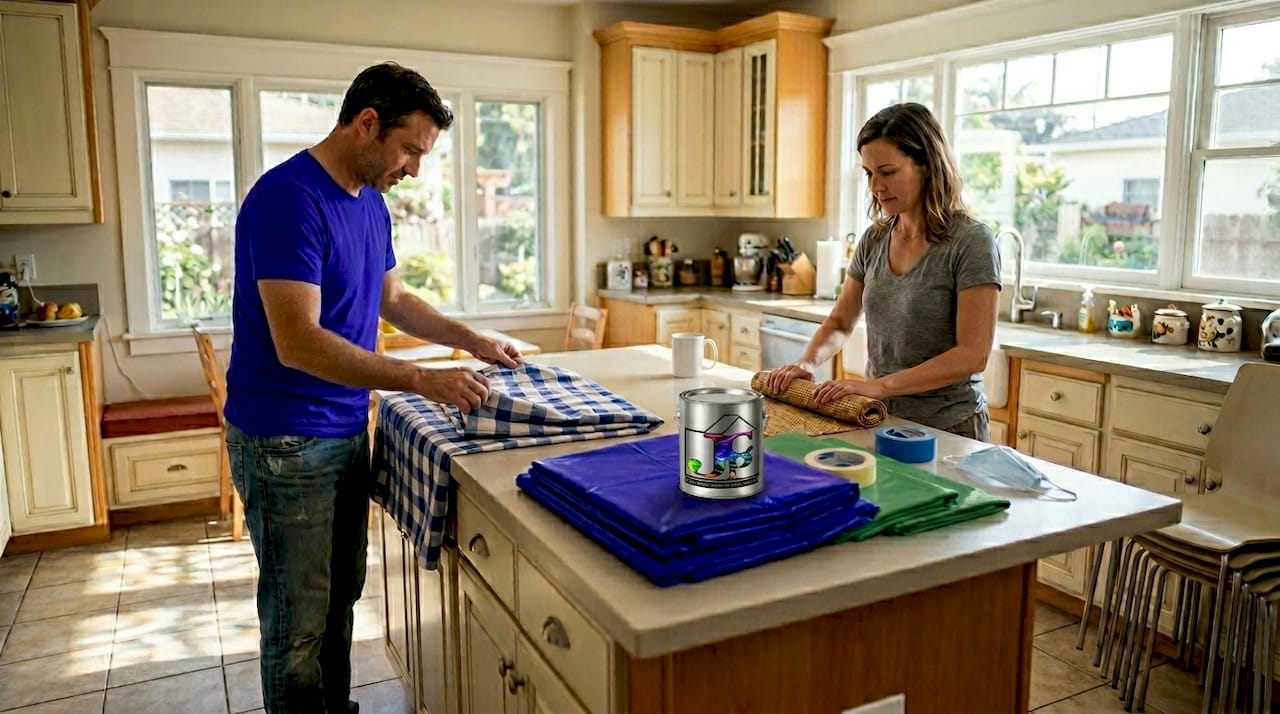
Prep your space for minimal mess
With an understanding of disruptors, here’s how to prep your space for smooth painting with minimal interference. Preparation isn’t glamorous, but it’s the step that determines how your entire project goes. A room that’s properly staged before the first brushstroke takes far less time to restore afterward.
Follow this numbered checklist to get your space ready:
Clear the work zone completely. Move all furniture at least six feet from the walls. If the room is small, shift everything to the center and cover it.
Cover all remaining furniture and fixtures. Use heavy-duty plastic sheeting secured with painter’s tape. Light drop cloths work for floors but aren’t enough for furniture on their own.
Seal HVAC supply and return vents. Use plastic sheeting cut to size and secured with painter’s tape around all four edges.
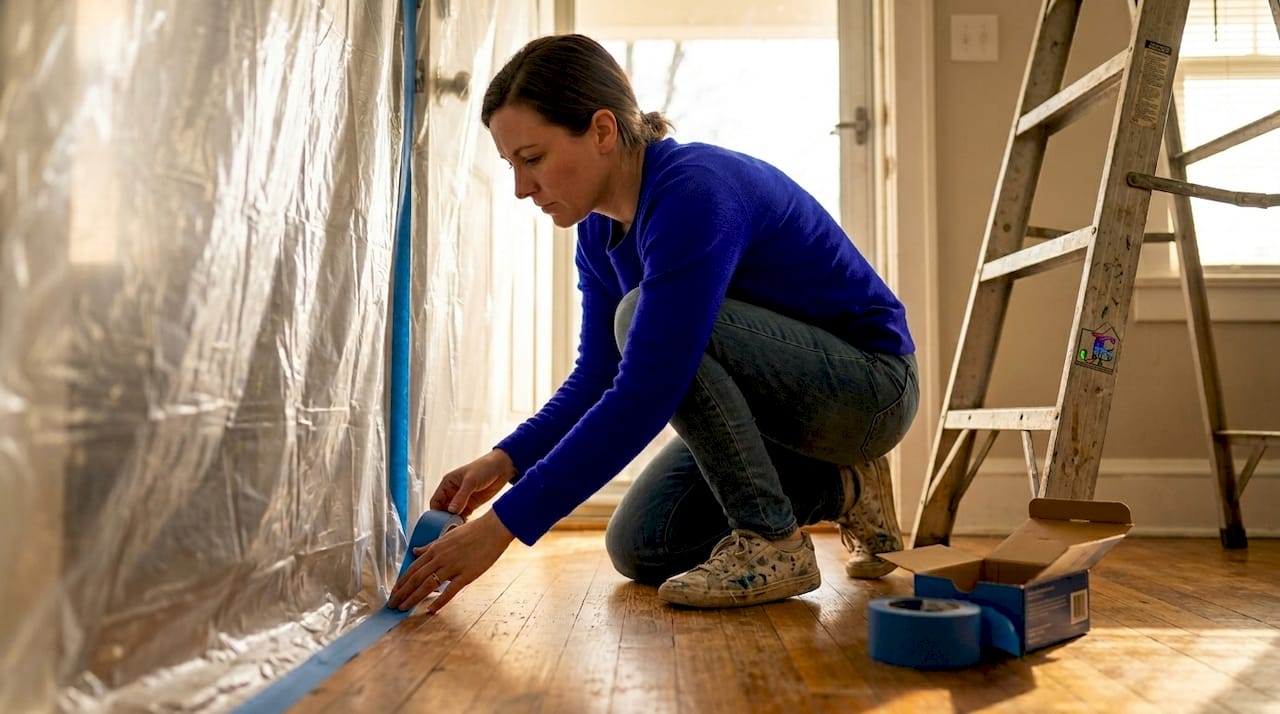
Seal interior doorways leading to other rooms. A plastic barrier over the doorframe keeps dust from migrating during sanding and application.
Lay drop cloths on all flooring within the work zone. Canvas drop cloths are better than plastic for floors because they’re non-slip and absorb drips instead of letting them spread.
Place walk-off mats at every entry and exit point of the work zone. These catch dust and paint particles from shoe soles before they reach clean floors.
Remove outlet covers, light switch plates, and hardware. These small items collect paint drips and are much easier to protect by removing them entirely.
Here’s how common prep methods compare in terms of protection and practicality:
Prep method | Level of protection | Ease of use | Best for |
Canvas drop cloths | High (absorbs drips) | Moderate | Floor coverage |
Plastic sheeting | High (broad coverage) | Easy | Furniture, vents, doors |
Walk-off mats | Moderate (captures tracked debris) | Very easy | Entry/exit points |
Painter’s tape alone | Low | Very easy | Edge detail only |
Using barriers like drop cloths and walk-off mats directly targets how dust spreads most commonly through a home: on the soles of shoes and on airflow. Stopping those two pathways at the source keeps the rest of your house clean without extra effort.
Pro Tip: Heavy-duty walk-off mats at every entry and exit point of the work zone can cut cross-room dust spread by as much as 80 percent. Change or shake out those mats at least once per day to keep them effective. Letting a clogged mat sit in place is nearly as bad as having no mat at all.
Before painting starts, walk through your wall prep steps to make sure surfaces are ready. Skipping surface prep often means more sanding mid-project, which dramatically increases dust and delays your timeline.
Containment strategies for dust and debris
Once your space is prepped, containment is the next crucial defense against mess and disruption. Preparation sets the stage, but containment keeps the situation controlled once work is actively underway.
The most effective containment approach follows a defined workflow. Think of it as building a bubble around the work zone and then keeping anything generated inside that bubble from escaping:
Stage the work zone before any sanding or application. Confirm all plastic barriers are secure, vents are sealed, and floor protection is in place.
Seal the doorway entry with a plastic zipper barrier. These inexpensive kits let painters move in and out without dismantling the containment wall each time.
Begin surface preparation in sections. Sand small sections at a time and immediately vacuum the resulting dust before moving to the next section.
Run a HEPA vacuum continuously alongside sanding. Some professionals use a sander with a built-in dust collection port connected directly to a HEPA vacuum, which captures particles before they ever reach the air.
Apply paint in the sealed space. With vents sealed and the doorway contained, fumes and overspray stay within the work zone.
Do a rough cleanup before opening the containment. Vacuum surfaces and floors while the plastic barriers are still in place. This is critical because opening the containment while dust is still airborne instantly spreads it.
Remove containment carefully and do a final wipe. Take down plastic from the top down to let any settled dust fall onto the floor rather than onto clean surfaces.
As dust control best practices confirm, sealing doors, vents, and the work area with plastic before using a HEPA vacuum during the process, then executing staged cleanup from rough to final wipe, is the workflow that actually prevents spread rather than just managing it after the fact.
The benefits of this approach include:
Dust stays confined to the work zone instead of settling throughout the house
HEPA filtration prevents fine particles from recirculating through vacuum exhaust
Staged cleanup means the final pass takes minutes, not hours
Living spaces remain usable while work is ongoing in a contained room
“If you’re painting while living in the home, the biggest lever is containment: seal HVAC vents, seal the doorway, use barriers, and vacuum and clean in a defined order so dust doesn’t spread beyond the work zone.”
For more in-depth guidance on professional technique, browse these expert painting tips from our team. And if air quality is a concern for your household, learning how to apply low-VOC paint properly pairs directly with these containment methods to keep your indoor environment healthy throughout the project.
Efficient cleanup: keeping your home livable
After dust containment, restoring normalcy depends on a smart cleanup strategy and final checks. Cleanup done in the wrong order can undo everything your containment setup accomplished. The sequence matters as much as the effort.
Follow these steps for layered, efficient cleanup:
Vacuum all surfaces within the work zone while containment is still in place. Start from the top, ceiling, then walls, then baseboards, then floors.
Remove containment materials carefully. Roll plastic sheeting inward so that any settled dust stays inside the plastic, then dispose of it immediately.
Vacuum the floor one more time after containment is removed to catch anything that fell during takedown.
Wipe all horizontal surfaces with a lightly damp microfiber cloth. This captures fine dust that the vacuum missed and prevents it from becoming airborne again.
Inspect adjacent areas. Even with perfect containment, check hallways and nearby rooms for tracked dust and wipe down surfaces there too.
Check the HVAC system before turning it back on. Replace your air filter before restarting to prevent any captured particles from recirculating through the system.
Pro Tip: A final wipe with a lightly damp microfiber cloth is the most underrated cleanup step. Dry cloths push fine particles around. A damp cloth traps them. Do this last, after vacuuming, and you’ll find surfaces that look genuinely clean rather than just good from a distance.
Here’s what to check before declaring the space fully restored:
No visible dust on shelving, window sills, or light fixtures
Floors free of paint drips, dried compound, or grit
HVAC filter replaced and system running clean
Walk-off mats removed or replaced
Furniture moved back only after all surfaces are dry and verified clean
The full eco-friendly painting cleanup process matters especially in LA homes where air quality is already a consideration. For ongoing ideas on what’s possible once the mess is behind you, the home transformation gallery is worth a look. And if you’re managing a multi-room project, the approach to paint project management in Los Angeles covers how to sequence rooms so that one finished space stays clean while work continues in another.
The uncomfortable truth about painting disruption: Why shortcuts fail
Here’s something most painting guides won’t tell you: the homeowners who end up with the biggest messes are almost never the ones who skipped cleanup entirely. They’re the ones who did half the prep work and trusted the other half to good intentions.
Skipping one vent seal because it’s in a closet. Using a regular vacuum instead of a HEPA unit because it’s what’s on hand. Pulling plastic barriers down while dust is still actively settling. Each of these shortcuts feels insignificant in the moment. Cumulatively, they turn a manageable project into a whole-home cleaning emergency.
After 16 years of painting homes across Los Angeles, the pattern is unmistakable. The projects that run smoothly are the ones where every step of containment gets followed through. Not because the individual steps are complicated, but because each one closes a gap that dust or paint would otherwise exploit. Miss one gap and the mess finds it.
There’s also a time math problem with shortcuts. Homeowners often skip prep steps to save 30 minutes at the start of a project. Then they spend three to five hours cleaning dust off furniture in rooms that were never supposed to be affected. The “quick” approach consistently costs more time, not less.
The other thing worth saying plainly: containment is about process, not products. You don’t need expensive equipment. You need the right sequence followed consistently. A five-dollar roll of plastic sheeting and a bag of walk-off mats outperforms any specialty product used without discipline. If you’re dealing with surface repairs alongside your paint project, the approach to drywall repair follows the same logic: do the prep correctly and the finish work becomes straightforward.
Trusted painting solutions for a smoother experience
Putting these strategies into practice is entirely doable as a homeowner, but there’s a meaningful difference between knowing the steps and executing them with the efficiency that comes from doing this every day.

At Johnny’s Custom Painting, our crews work in occupied Los Angeles homes regularly, which means our containment and cleanup process isn’t theoretical. It’s something we refine on every project. We use HEPA-rated equipment, seal work zones before a single surface gets touched, and stage cleanup so your living spaces stay functional throughout. You can see the results directly in our interior painting portfolio or take a look at our exterior painting work to get a sense of the quality and care we bring to every project. If you’re ready to plan your next painting project with a team that treats your home like their own, reach out for a free estimate today.
Frequently asked questions
What is the most effective way to keep dust from spreading during painting?
Seal HVAC vents, interior doorways, and the entire work zone with plastic sheeting before any sanding or surface prep begins. Containing dust at its source by shutting down the HVAC system entirely is the most impactful single step you can take.
Should I vacuum during or after painting to minimize disruption?
Vacuum during the project with a HEPA vacuum as each sanding stage is completed, then finish with a staged cleanup and a final wipe-down using a damp microfiber cloth for thorough results.
How do I keep my furniture safe during a painting project?
Clear the room when possible, and cover remaining pieces with heavy-duty plastic sheeting secured on all sides with painter’s tape. Light coverings alone won’t prevent dust from settling through fabric furniture surfaces.
Are walk-off mats really necessary when painting indoors?
Yes. Walk-off mats at every exit point from the work zone are one of the most cost-effective tools available because they stop tracked dust from spreading to adjacent clean rooms before it has a chance to settle.
Recommended