
How to prep walls for painting: pro steps for a flawless finish
- Jonathan Hernandez
- 1 day ago
- 10 min read

TL;DR:
Proper wall preparation involves cleaning, repairing, sanding, and priming for a smooth finish. Skipping these steps can lead to uneven, streaky, or peeling paint. Proper prep significantly improves paint durability and appearance, often more than the quality of the paint itself.
You finally picked the perfect color, bought the premium paint, and rolled it on with care. But the finished walls still look bumpy, streaky, or uneven. Sound familiar? This is one of the most common frustrations homeowners in Los Angeles run into, and the root cause is almost always the same: skipping or rushing wall preparation. The good news is that proper prep is completely learnable, and once you follow the right sequence, even a DIY paint job can look like it was done by a seasoned professional. This guide walks you through every step, from gathering tools to applying primer, so you get smooth, durable, and beautiful results.
Table of Contents
Key Takeaways
Point | Details |
Prep determines results | How well you prepare your walls has a bigger impact on the final finish than the paint itself. |
Follow each prep step | Clearing, repairing, sanding, cleaning, and priming in sequence ensures smoother, longer-lasting results. |
Proper tools matter | Using the right materials and tools avoids frustration and helps DIYers achieve pro-level work. |
Don’t rush repairs | Take extra time to patch and sand so that flaws don’t show after painting. |
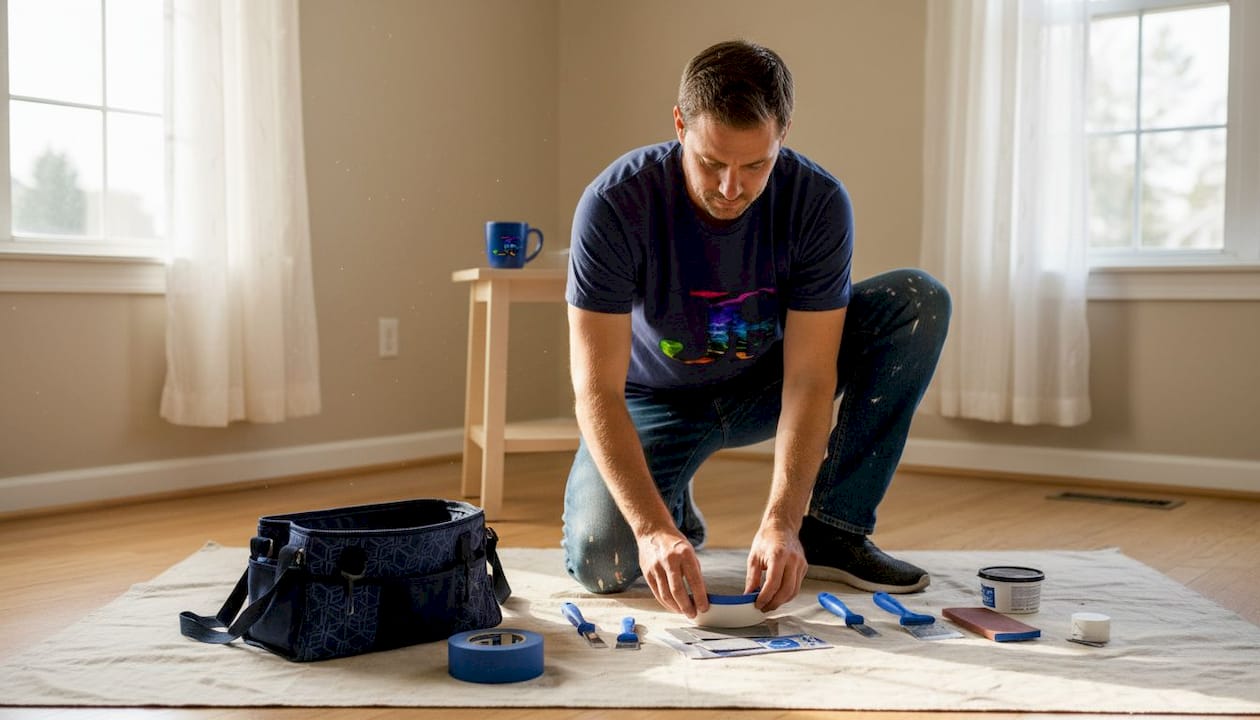
What you need: Tools and materials for wall prep
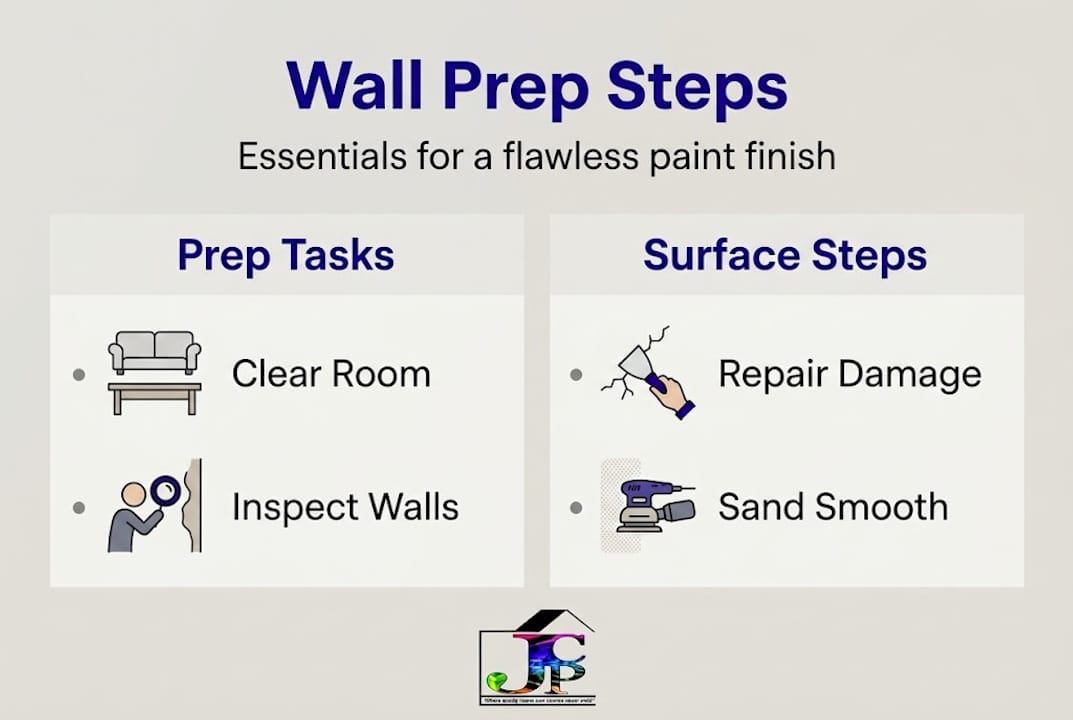
Once you understand why prep matters, the next move is gathering everything before you start. Running back to the hardware store mid-project wastes time and breaks your momentum. Good preparation actually means surface preparation techniques that follow a repeatable, logical sequence: clear and cover, inspect, repair, sand, clean, then prime.
Here is a breakdown of what you need:
Must-have tools and materials:
Spackle or lightweight joint compound
220-grit sandpaper (for smoothing patches and glossy spots)
Sanding block or pole sander for flat wall surfaces
Drop cloths (canvas holds up better than plastic)
Painter’s tape (2-inch for most trim and edges)
Trisodium phosphate (TSP) cleaner or a mild degreaser
Bucket and sponge for washing walls
Putty knife (3-inch and 6-inch)
Primer (see Section 3 for types)
Paint roller frame, roller covers, and angled brushes
Tool or material | Must-have | Optional |
220-grit sandpaper | Yes | |
Spackle or joint compound | Yes | |
Drop cloths | Yes | |
Painter’s tape | Yes | |
TSP cleaner or degreaser | Yes | |
Primer | Yes | |
Pole sander | Yes (saves effort on large walls) | |
Corner bead | Yes (for damaged drywall edges) | |
Mesh drywall patch kit | Yes (for larger holes) | |
Caulk gun and paintable caulk | Yes (for gaps around trim) |
Pro Tip: Always match your sandpaper grit to the job. Use 80 to 120 grit to knock down rough texture or major ridges, then follow up with 220 grit to smooth everything out before priming. Jumping straight to 220 on rough spots leaves visible scratches in your finished paint.
The right prep sequence is: clear and cover, inspect, repair with spackle or joint compound, sand smooth, clean dust and contaminants, then prime. Every step feeds into the next, so skipping one creates problems two steps later.
Step 1: Clear, cover, and inspect your walls
With your tools ready, start by making your workspace safe and organized. This step takes less than an hour but protects your floors, furniture, and trim from accidental paint drips and dust.
Here is a numbered checklist to follow:
Remove all furniture from the room, or push it to the center and cover it with drop cloths.
Take down artwork, mirrors, and any wall hangings.
Unscrew all outlet covers and switch plates. Store the screws inside the electrical box so they do not get lost.
Lay canvas drop cloths across the entire floor, overlapping edges by at least six inches.
Apply painter’s tape along all trim, baseboards, door frames, and the ceiling line where it meets the wall.
Walk the entire room slowly and inspect every wall surface under bright light.
During your inspection, look closely for hairline cracks near corners or around windows, nail pops (small bumps where drywall nails push through), water stains (yellowish rings that indicate previous leaks), and peeling or bubbling paint. Mark problem areas with a light pencil tick so you do not miss them during repairs.
Fixing wall imperfections before painting is what separates a lasting paint job from one that starts peeling or cracking within a year or two. If you spot staining that looks like water damage, track down and fix the moisture source before painting over it, or the problem will return.
Safety warning: If you notice black, green, or fuzzy growth on your walls, do not sand or scrub it dry. That could be mold, and disturbing it can spread spores. Call a remediation professional before proceeding. Similarly, avoid working near open electrical boxes without turning off the circuit at the breaker panel.
For older homes in the Los Angeles area built before 1978, keep in mind that lead paint may be present. If you suspect lead, use an inexpensive lead test kit from any hardware store before sanding anything. This is not optional, as lead dust poses serious health risks. Interior painting tips from experienced contractors always include this reminder for older properties.
Following a clear prep sequence of clearing, covering, and inspecting before you reach for any repair materials keeps the process efficient and prevents rework.
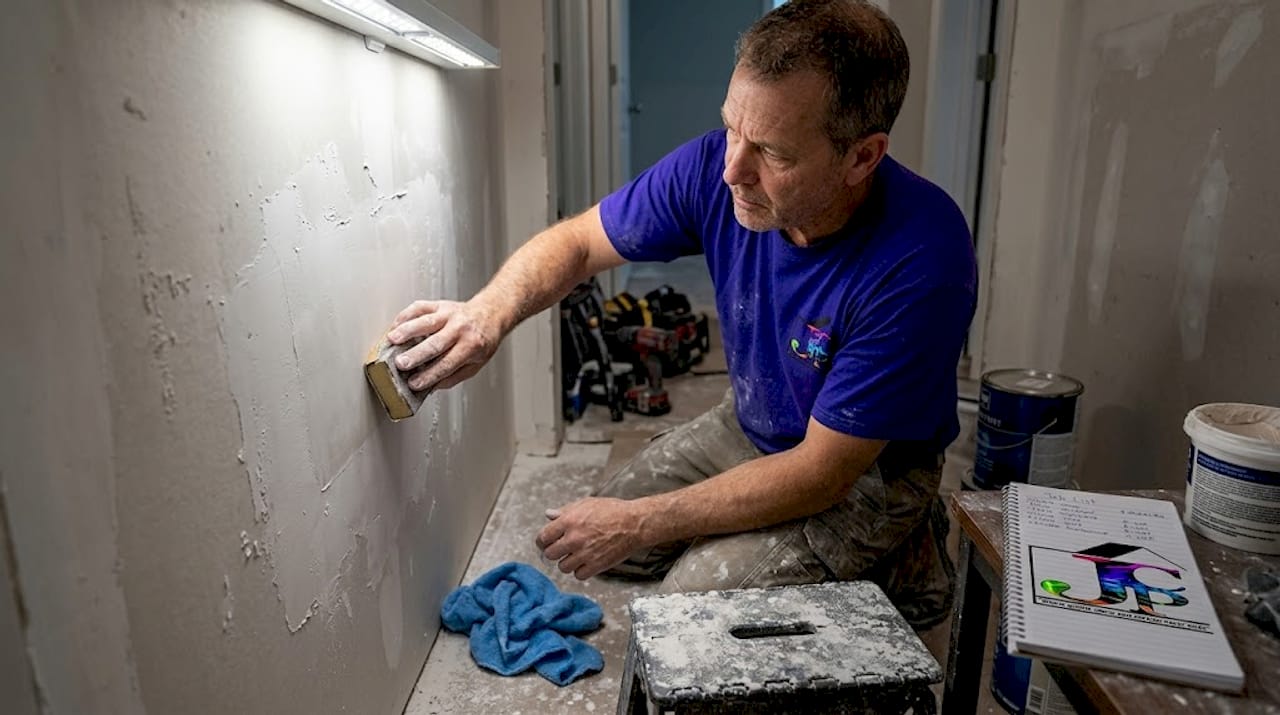
Step 2: Repair, patch, and sand for a smooth surface
Once the room is prepped and your problem spots are marked, you can focus entirely on repairs. This is the most hands-on phase, and it is also where most DIYers either rush or overcorrect. Both cause problems.
Step-by-step repair process:
For small nail holes and shallow cracks, apply a thin layer of lightweight spackle using a 3-inch putty knife. Press it firmly into the hole and smooth it flat.
For larger holes (over half an inch wide), use a mesh patch kit combined with joint compound. Apply the compound in two or three thin layers, letting each layer dry fully (at least two to four hours) before adding the next.
Once repairs are dry and hard to the touch, sand all patched areas using 220-grit sandpaper until they are flush with the surrounding wall. Do not rush this.
Sand any glossy areas on the wall, even if there is no visible damage. Paint does not stick well to shine.
Wipe sanded areas clean with a dry tack cloth before moving on.
Here is a quick reference for matching repair methods to damage types:
Type of damage | Best repair method |
Small nail holes | Lightweight spackle, one coat |
Hairline cracks | Flexible paintable caulk or spackle |
Medium holes (half inch to 2 inches) | Joint compound with mesh patch |
Nail pops | Re-screw, dimple, two coats joint compound |
Peeling paint | Scrape, sand edges smooth, prime before repainting |
Scuffs and dents | Skim coat of joint compound, sand smooth |
The standard repair and sanding workflow includes using fine-grit sandpaper around 220, wiping and cleaning to remove dust and grease, then priming before painting. Skipping the sanding step after repairs is one of the most common reasons patches show through paint, even after two coats.
For homes with textured walls, a popular style in many Los Angeles neighborhoods, blending your patch into the surrounding texture takes a little extra skill. You can use a small brush or sponge to mimic the existing texture while the joint compound is still slightly wet. Check out more detail in our drywall repair tips and exterior surface prep guides for surface-specific advice.
Pro Tip: After sanding, shine a strong flashlight at a sharp angle (nearly parallel to the wall surface). This “raking light” technique reveals low spots, ridges, and uneven patches that look invisible under regular overhead lighting. Fixing these before primer saves you from seeing them under your final paint color.
Step 3: Clean, prime, and get ready to paint
With repairs complete, shift your focus to making the surface clean and fully ready to accept paint. Even perfectly smooth walls will cause paint adhesion problems if they carry dust, grease, or residue from cleaning products.
Cleaning the right way:
Start by wiping all repaired areas with a slightly damp microfiber cloth to lift fine sanding dust. Then wash the entire wall surface using a TSP cleaner or a mild degreaser mixed with warm water. Use a sponge or soft cloth in circular motions, then rinse the wall with clean water and let it dry completely before priming.
In kitchen and bathroom spaces, pay extra attention to areas near the stove, exhaust fans, and shower surrounds. Cooking grease and soap film are practically invisible but they prevent paint from bonding, which leads to peeling within months. Cleaning before priming removes dust and grease so your primer and topcoat have a fighting chance at lasting adhesion.
Types of primer and when to use each:
PVA (polyvinyl acetate) primer: Best for new drywall or freshly skimmed surfaces. Seals porous areas and prevents the wall from absorbing too much paint.
Stain-blocking primer: Use this over water stains, smoke damage, or marker marks. Regular primer will not fully block these, and the stain will bleed through your topcoat.
Bonding primer: Ideal for slick surfaces like semi-gloss paint, tile, or paneling. It creates a mechanical grip that helps topcoats adhere.
All-purpose primer: Works well for standard repaints on previously painted walls with minor repairs.
Primer is not optional when you are painting over repairs. Patched spots are more porous than the surrounding wall, and without primer, they absorb paint at a different rate. The result is a noticeable dull patch under your finish coat called “flashing.” Primer equalizes the surface so your topcoat goes on evenly and looks consistent across the whole wall.
Get more detail on achieving the best results with our tips for flawless painting guide, which covers product selection and application techniques in depth.
Troubleshooting and avoiding common wall prep mistakes
To make sure all your prep effort pays off, watch out for these typical pitfalls that even motivated DIYers fall into regularly.
Most common mistakes and their solutions:
Rushing sanding: Sanding too fast leaves ridges and uneven surfaces. Solution: slow down, use a sanding block for flat pressure, and check your work under raking light.
Skipping primer: Many homeowners assume a quality paint does not need primer. It does, especially over repairs or bare drywall. Solution: always prime patched or new surfaces, no exceptions.
Painting over dust: Sanding generates a lot of fine dust that settles on walls, and paint will not bond over it. Solution: always wipe walls with a damp cloth and let them dry fully before opening the primer can.
Ignoring small cracks: Hairline cracks seem harmless until they show up through two coats of premium paint. Solution: fill every crack you find during inspection, no matter how small.
Using the wrong primer: Using an all-purpose primer over a water stain lets the stain bleed through. Solution: match your primer to the specific problem you are covering.
Not letting repairs dry fully: Joint compound shrinks as it dries. If you sand too early, you may sand into a still-soft center and the patch will crack later. Solution: wait the full recommended dry time, which is usually overnight for thicker applications.
The key principle here reinforces the full prep sequence: clear and cover, inspect, repair with spackle or joint compound, sand smooth, clean dust and contaminants, then prime. Skipping any phase of this cycle is where problems enter.
Pro Tip: Before you crack open your primer, do one final walk-around with a bright work light held at an angle to the wall. Run your bare hand over patched areas to feel for bumps or ridges that the eye might miss. Catching those now costs you five minutes. Catching them after painting costs you an entire weekend of rework.
Make use of our surface prep techniques guide to go even deeper on specific wall materials and finishes common in LA homes.
Our perspective: Why proper wall prep matters more than the paint itself
Here is something most paint guides do not say plainly enough: the quality of your paint matters far less than what happens underneath it. After 16 years working on homes and commercial properties across Los Angeles, we can tell you with certainty that a mid-grade paint on a properly prepped wall will always look better than the finest premium paint slapped over a rough, dusty surface.
We think of it as the 80/20 rule for painting: about 80% of your final result comes from preparation, and only 20% comes from the actual painting. That ratio surprises a lot of homeowners, but it holds up every single time. Paint is essentially a thin film. It does not fill. It does not hide. It magnifies. Every ridge, dust particle, and unsanded patch becomes more visible under color, not less.
The shortcuts that backfire most consistently are rushing sanding and skipping primer to save time. In our experience, those shortcuts cost homeowners two to three times more time later when the paint peels, cracks, or looks unprofessional. Doing it right the first time is genuinely faster in the long run. Follow expert painting advice built on real-world experience, and you will see the difference immediately.
Ready for perfect walls? Let our experts handle it
If working through these steps on your own feels like a bigger project than you signed up for, or you simply want results that are guaranteed to look professional, our team at Johnny’s Custom Painting is ready to help.

We serve homeowners throughout Los Angeles with interior and exterior painting services built on thorough preparation, premium materials, and over 16 years of hands-on experience. You can browse our completed interior painting projects and exterior painting projects to see firsthand what proper prep and professional execution look like. We are licensed, insured, and use eco-friendly, low-VOC paints. Contact us today for a free estimate and let us take the prep work off your plate.
Frequently asked questions
Do I need to wash my walls before painting?
Yes, cleaning walls removes dust, grease, and contaminants so that paint and primer stick properly and bond for the long term.
Is priming always necessary before painting?
Priming is strongly advised, especially over repairs, stains, new drywall, or significant color changes, to ensure even color and adhesion across the finished surface.
Can I paint over old peeling paint?
No. You need to remove peeling paint, repair and sand the area, then prime before repainting to prevent the same problem from returning.
What grit sandpaper should I use for walls?
Fine-grit sandpaper around 220 grit is recommended for smoothing repaired areas and scuffing glossy spots before priming for best adhesion.
Recommended
Comments